Motor Grader Basics for Blade Setup, Slope Control and Passes
Hands-on grader techniques for blade setup, windrow control, holding slope with or without machine control, and planning passes that boost production.
When you put a motor grader to work, blade setup and slope control make the difference between a pass that flies and one that fights you. If you are cutting subgrade, shaping ditches, building crown, or finishing base, small adjustments to blade angle, pitch, articulation, and wheel lean translate directly into smooth surfaces and fewer rework passes. This practical guide covers motor grader basics you can use on any site.
Know your controls and what they do
You do not need every feature on every pass, but understanding how each control changes how the grader behaves is step one.
- Circle rotation turns the moldboard to set the cutting angle relative to travel. More angle slices and moves material, less angle spreads and finishes.
- Side shift (moldboard and drawbar) slides the blade left or right to place the cut under the machine or outside the tires for shoulder and ditch work.
- Moldboard pitch tips the top of the blade forward to increase bite and penetration, tipping it back carries and smooths.
- Blade height (lift) sets cut depth and float. Use float for final smoothing, lock it out for cutting.
- Articulation bends the frame to help track straight under load, offset the tandem for tight areas, or keep a steady windrow when turning.
- Front wheel lean into the windrow counters blade side draft and maintains steering authority.
- Scarifier or ripper breaks hard material or compaction ahead of the moldboard so you are cutting and mixing instead of bouncing.
Blade positions that deliver results
Think of blade setup as a spectrum from “cut” to “carry/finish.” Most tasks land somewhere between, and you will adjust as material changes.
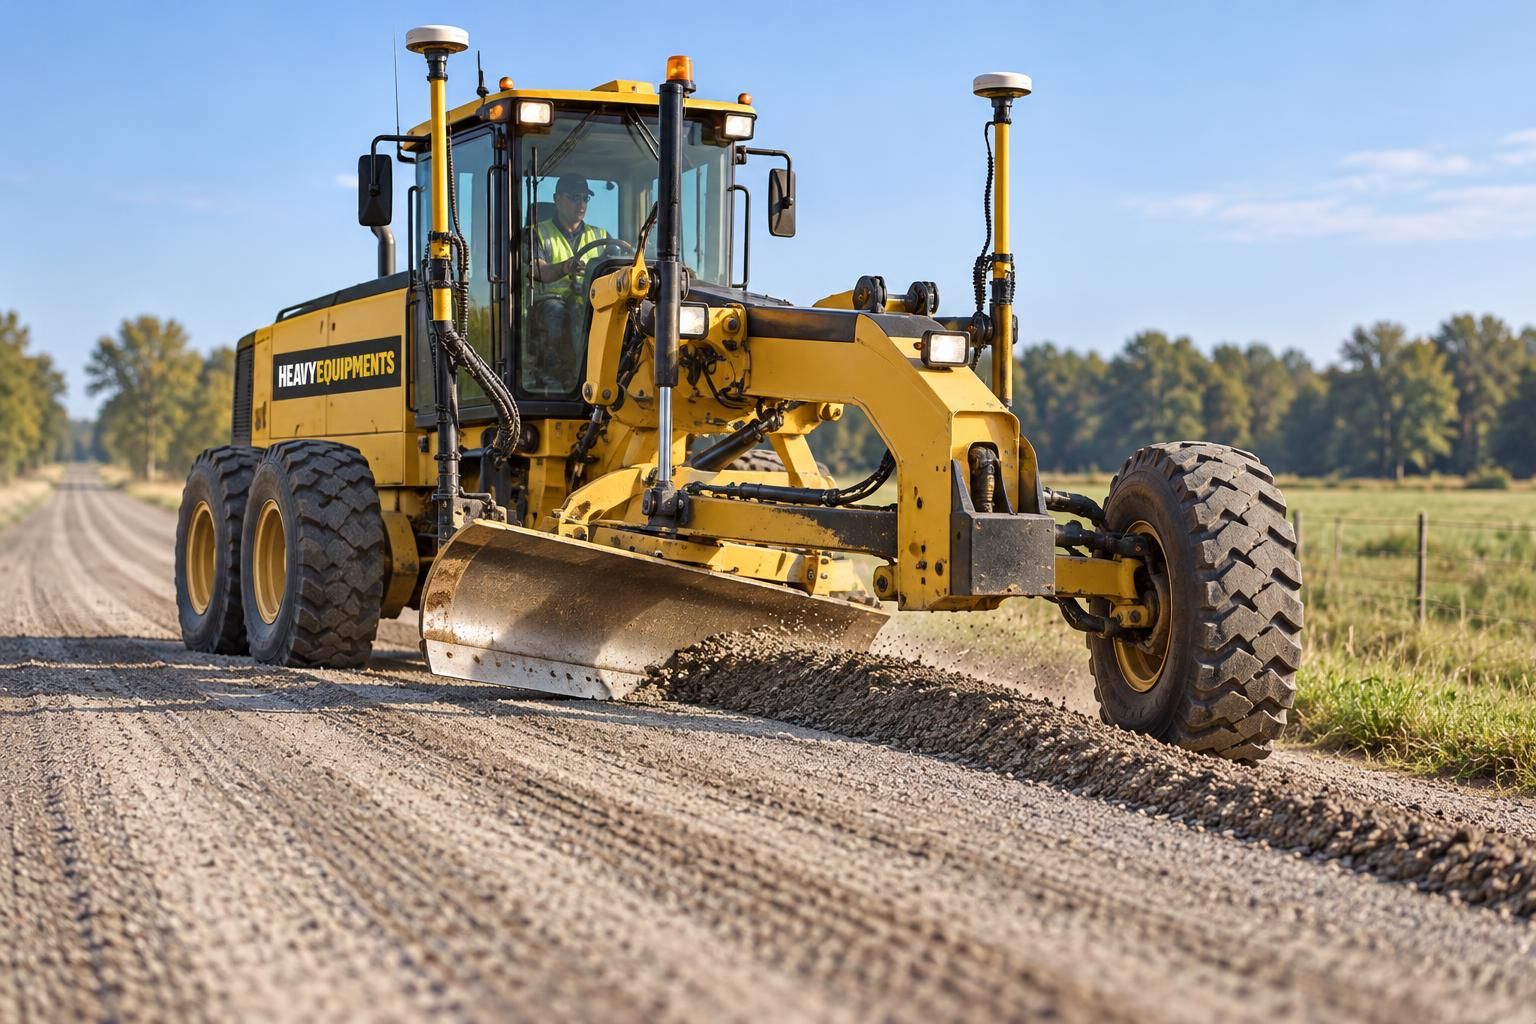
- For cutting or slotting, use a forward pitch and a moderate to high circle angle. Side shift so the toe of the blade is just inside the tire path, with front wheels leaned slightly into the windrow. This slices high spots and starts a controlled roll of material across the moldboard.
- For windrow carry, reduce pitch slightly and keep a consistent angle so material rolls like a barrel, not in chunks. If it is boiling or spilling, increase angle or tip forward a touch, if it will not move, tip forward or drop a little more depth.
- For spreading, back pitch the moldboard to carry more and reduce bite. Lower the circle angle so the windrow fans out evenly without leaving ridges.
- For finishing, use light down pressure, keep the blade near flat with a slight back pitch, and float as needed. Keep circle angle low, you are ironing, not slicing.
- For shoulder and ditch work, side shift the blade outside the tire track, set a steeper moldboard angle to cut and cast uphill or downhill as needed, and lean the front wheels into the bank to resist side draft. Articulate away from the ditch to keep the tandems on stable ground.
Watch the material. A smooth, continuous roll means the setup is doing the work. Chunking, chatter, or a windrow that surges and disappears means you need to tweak angle, pitch, speed, or down pressure.
Windrow management for productivity
A predictable windrow is your moving stockpile and your quality control. Manage it, and your passes shorten dramatically.
- Start small and build. Begin with a modest windrow so the blade does not stall. As you gather material from adjacent lanes, the roll will grow naturally.
- Keep it rolling. If the windrow boils, you are too aggressive or too fast. If it collapses, you need more angle or a small depth increase. Adjust one thing at a time.
- Place the windrow smart. Keep it where your next pass can pick it up, typically just off the toe of the blade. On crowns, work from the outside toward the center or the opposite direction depending on haul-in needs.
- Blend, do not streak. Feather the moldboard when transitioning between wet and dry or coarse and fine. A slight back pitch and a touch more speed can help mix and homogenize before final spread.
- Turn without losing it. Articulate into the turn and lean the front wheels into the windrow to keep load on the blade. Maintain a steady throttle to avoid surging.
Slope control manual and machine
Holding design slope is part technique, part technology. Both matter.
Manual slope holding
- Use a reference. Work off a stringline, edge form, existing lane, or a straight guide on your first pass. The first lane becomes your control for the next.
- Set one side and match it. Lock the left lift at the desired height and fine tune with the right, or vice versa. Many operators prefer riding one tire on compacted ground for an immediate feel.
- Mind transitions. For crossfall changes, shorten your blade contact and reduce speed. Feather adjustments rather than cranking lift controls.
Machine control on graders
Modern machine control makes holding slope repeatable, especially over long runs and complex transitions.
- 2D cross slope uses a cross slope sensor to maintain a set crossfall by automatically adjusting one side of the blade. It is ideal for consistent crowns, pads, and simple tapers.
- 3D guidance uses GNSS or total station based systems to reference a digital design, control both sides of the moldboard, and track alignment, elevation, and transitions. Great for roadwork with changing crossfall, super elevations, and tie-ins.
- Best practices include calibrating sensors at the start of the shift, verifying design units and offsets, and running in auto only after the blade is loaded and stable. Many operators use auto on one side and manual on the other for feel and speed.
Plan productive passes
Fewer, better passes beat many messy passes. Lay out your sequence before you roll.
- For the rough cut, break hard spots with scarifiers if needed. Use a forward blade pitch and moderate angle to knock down highs and build a manageable windrow.
- Make balancing passes to carry material to fills and low areas. Articulate slightly to keep the machine tracking and the windrow riding the toe of the blade.
- If the blend is uneven, make a mixing pass with a bit less angle and more back pitch to tumble, not slice. Coordinate with water truck or stabilizer as needed.
- For the spread, reduce angle, back pitch the blade, and fan out the windrow to target thickness. Overlap passes slightly to avoid ridges.
- For the finish, apply light pressure, keep a low angle, and use float in small sections. Let the cutting edge skim, aim for long, straight passes that tie into fixed features cleanly.
Match travel speed to the task. Cutting and mixing prefer steady, slower ground speed for control, spreading and finishing tolerate a bit faster as long as the moldboard stays stable.
Avoid the common problems
- Washboard or ripples usually come from too much speed, an overly aggressive pitch, or dry, chunky material. Slow down, tip the blade back slightly, and add moisture or reduce depth.
- Scalloping edges often come from over articulation or jerky lift inputs. Straighten the frame a bit and smooth out lift adjustments.
- Windrow spills happen when angle is too low for the amount of material, or when traveling too fast into a curve. Increase angle or make an extra balancing pass before turning.
- Shiny streaks or polished highs mean the blade is too flat while trying to cut. Tip forward to add bite and reduce carry until the surface is even.
- Edge berms call for feathering the last few inches of blade on each pass, or a cleanup pass with minimal angle to knock berms back into the mat.
Daily setup and jobsite checks
Good results start before the first cut.
- Do a walk around. Inspect tires and tandems, cutting edges and end bits, circle gear and slide rails, linkages, and hydraulic lines. Replace worn edges before finish work.
- Set up the blade. Stagger cutting edges if your machine and application allow to reduce chatter. Verify the moldboard is straight with no twist.
- Check controls and calibration. Test lift, float, articulation, circle rotation, and front wheel lean. If using machine control, run calibration and confirm the correct design file and control mode.
- Read the surface. Walk key areas, identify utilities and soft spots, note tie in elevations, and confirm target crown or ditch lines.
Safety fundamentals for grader work
- Maintain visibility and spacing. Keep people and haul units clear of the moldboard and windrow. Use radios and spotters in tight areas.
- Treat edges and slopes with care. Avoid placing the tandem near drop offs. When cutting on slopes, lean wheels into the bank, articulate away from the edge, and position the moldboard to catch any slide.
- For transport and adjustments, lower the moldboard when parked, set proper lockouts for service, and maintain three points of contact when climbing on or off.
Choose the right machine and keep cutting
With the fundamentals of blade position, windrow control, and slope management in hand, the rest is matching a motor grader to your site and keeping it equipped. Use our spec tools to explore sizes, weights, and capabilities, then line up iron and support.
- Research models and capabilities on our specs catalog.
- Shortlist options side by side with specs compare.
- Line up iron on your timeline via for sale listings or rentals.
- Outfit your grader with cutting edges, scarifiers, and snow or shoulder tools from attachments.
- Keep downtime low with wear items and service kits from parts.
Dial in these basics, lean on machine control where it makes sense, and you will lay down smoother surfaces in fewer passes, no matter the material or season.